Fill out our form, and we'll connect with you within 1 to 2 business days.
Phone: (925) 989-7737
Tracking your website goals with Google Analytics is easier than you might think. Once you link your site, this powerful tool can monitor everything—from where your visitors are coming from to what they do after they leave. Setting things up is pretty straightforward, and the insights you get are incredibly valuable.
Think of Google Analytics Goals as a way to track important actions on your website—whether it’s someone making a purchase, signing up for your newsletter, or downloading a resource. By keeping an eye on these goals, you’ll get a better idea of what’s driving users to take action.
Let’s walk through the steps to get you set up and tracking like a pro.
Make an account in Google Analytics. You can create a new Gmail account specifically for your company or use your primary Google account, which you now use for other Google services, to complete this initial step.
Remember that the email address you use should correspond to the Google account you intend to maintain, and only you should be able to access it.

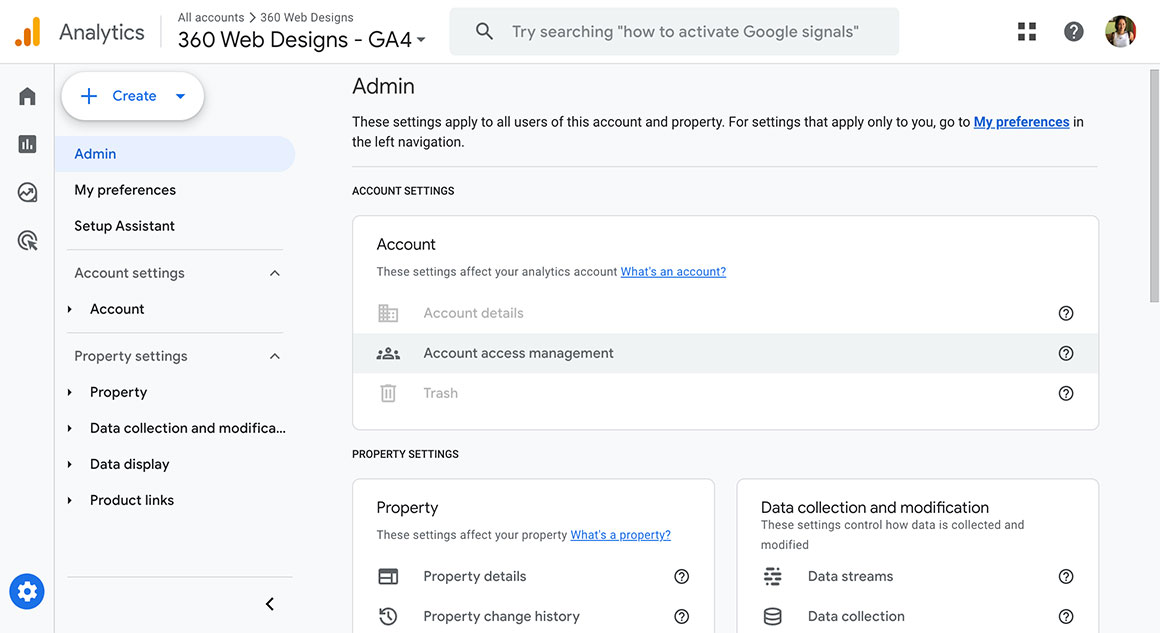
Once you’re in the Admin section, here’s what you do:
And that’s it! Your property is now set up.
Now, to start tracking data, you’ll need to add the GA4 tracking code to your site. If you’re using platforms like Shopify, Wix, or WordPress, there’s usually an easy way to do this—just look for sections like “Tracking,” “Analytics,” or “Header/Footer Scripts.”
Once you’ve added the code, check if it’s working by heading to the Real-Time Reports section in Google Analytics and visiting your site to see if your activity shows up.
In GA4, tracking goals is all about events. You can set up event tracking to monitor key actions like form submissions, button clicks, and page views. You can also exclude your own traffic by blocking your IP address.
Once everything is set, use the reports to keep an eye on your site’s performance and understand how visitors interact with it.
Sometimes it’s enough to track basic actions, but other times you need to see how users move through your site step by step. That’s where Goal Funnels come in.
Funnels let you:
Want to learn more about your visitors? Google Analytics has you covered with its “Audience > Demographics” section. Here, you’ll find details like:
This info can help you tailor your content and marketing to better connect with your audience.
Google Analytics is a goldmine of insights, but it’s only useful if you take the time to set it up properly. Many small businesses overlook goals because they’re not sure how to use them or don’t realize their importance. At 360 Web Designs, we believe goal tracking is one of the most valuable features of Google Analytics.
So take the time to set up your strategies and goal funnels—once you do, you’ll be amazed at the data that starts rolling in!
Need help setting up your Google Analytics property? Contact us today!